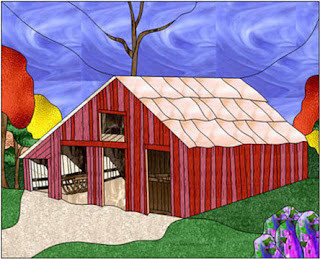
I found an old window at a recycle construction material store. I stripped & varnished the frame. I had a pattern I was following blown up at Kinko's & taped it behind the window. I used Mac glue & started gluing the pieces to the window. This was my first glass on glass. 97% of the glass is Youghiogheny glass & the rest is scrap glass. I hope you enjoy the progress of this window in the making.
 I was working on the preparation of the window, staining, varnishing - I started nipping the leaves so the trees was where I started on this project. I made strips of the green glass & then used wheeled nippers to trim up the leaves. A little bit of grinding to smooth out the shapes.
  I then started on the barn itself. This was the easiest to make. I used my Beetle Bits System to make the strips & then my wheeled nippers to trim all the barn boards.
  Then it was basically filling in the background. I sandwiched a pic of a border collie & placed in the road. My inlaws have a border collie named Shelby.
  The sky was the last part to be finished.
  This is the finished piece grouted. I did a color wash for the sky of a silvery blue & the roof of the barn a copper wash to depict rust.
  Here is the finished piece with the light shining through. The Yough glass just sings.
 Here is a pic of the original pattern. I originally wanted fall colors in the trees but I wanted to include cone flowers in the window (mother-in-laws favorite flower) so I had to use green leaves.
 This pattern was made from a photo taken in the 1940's. What was really awesome is that when the owner seen the finished piece, he said that it is exactly how it looked when his Dad first built the barn - down to the pine trees. I hope you enjoyed seeing this in the making. I sure had fun making it.


