Wednesday, September 23, 2009

The Lion

This is going to be a 12" x 14" mosaic of a lion. I went to Kinko's & had them blow up a pic I liked. For some reason the person made it more orange than the original pic but I took it anyway. I tape the pic behind the glass & am attempting to make it look like the lion. Now these are some really small pieces. I had to use tweezers to put the pieces on.


I just about finished with the face. I changed around the eyes a bit & tried to get the shadows of his face. This was a real challenge.


Now for the fun part. The mane! So far I've only used wheeled nippers. The ears I had to cut & use the grinder on. I have a tutorial on how I made the cuts for the mane in another tutorial on the blog under wheeled nippers. Very easy to do & fast! You just make your cuts & start tilting the pieces the direction you want the hair to to. You lay them down kind of alternating laying one piece down & the piece next to it you lay not directly beside it but halfway from where the first piece starts. Before you know it it looks like hair & it's finished.


Mane is finished & put in the background. I had in mind a more red sky but didn't have the glass. I wanted the gray part to look like a rock. But I'm not happy with it & will pull it off & just put the sky in.


I made some minor adjustments I wasn't happy with. Here is the king of the jungle in all his glory grouted & framed.


This is a special lion & is a gift for a very dear friend that is a missionary in South Africa. It was just hand delivered this week & they absolutely loved the lion.

Friday, April 10, 2009

Tempered Glass & Polymer Clay Mirror

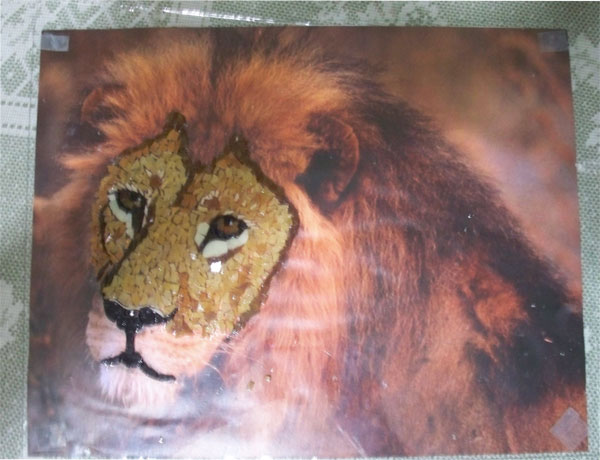
This project once underway gets done in one sitting. I am playing with the placement of the polymer clay tiles and laying out the background paper.


I painted the mirror edge and frame edge prior to gluing the pc (polymer clay) tiles down with Mac glue.


Begin by applying the background paper using a two part epoxy. I spread the epoxy evenly and thoroughly before placing the paper, then smooth it out to ensure contact.


Work your way around the now papered background with the tempered glass. I brushed the epoxy on top of the paper. It did darken the red to a deeper shade but it still worked.


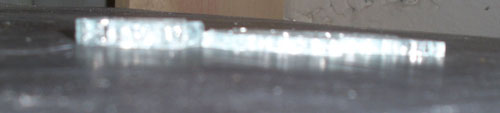
All the tempered glass is in place and let it dry overnight.


The mirror is now grouted. Prepare a mixture of gel medium, acrylic paints and mica powders to apply to the grey grout. Gel medium is available in art stores and Michael's, etc. I am using Liquitex Acrylic Gel Medium. I believe gel medium is normally used to extend the life of your paint so it doesn't dry as quickly. In this instance it makes a more even application of the paint and mica powders and is more workable.


I am using two colors, cardinal and gold as this is a USC mirror, to treat the grout and give it some bling. I just paint it on the grout lines, then rub it off. Sometimes it needs a damp paper towel to get it off the glass.


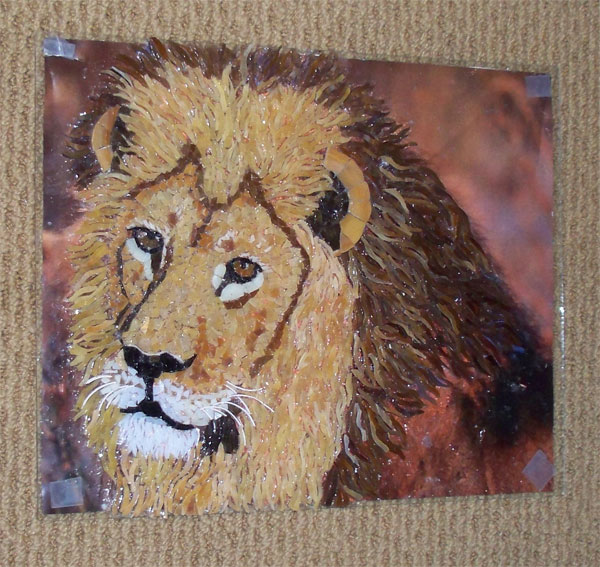
All cleaned up and just waiting to be sealed. This project was made with tempered glass, Ikea mirror, polymer clay tiles with metal embellishments, and red foil leaf.


The epoxy resin gives this piece real depth under the tempered glass. You can also use glitter, ribbon, etc. under the glass too. Here is another piece using glitter & ribbon under the tempered glass. I painted the background in different colors instead of a background paper.


You can follow Donna's work on Flickr by clicking here.

And our favorite forum to meet other mosaic friends is Mosaic And Stained Glass

A word from the author, Donna Post

I have always been the "crafty" one in the family-I started out with tole painting, then progressed into quilting and knitting. i have always admired mosaics, especially used in the garden, but never thought much about trying it until December 2007. I found a couple on the internet, "Passiflora Mosaics", that offered various classes. It was near a favorite getaway spot my husband and I love to visit, so I thought I'd combine the two! Hubby got to beach comb during the day, I was introduced to mosaics. My first project was a birdbath using ceramic tiles. I was hooked! I returned in early 2008 and used stained glass for the first time and made a mushroom. At this point, I went from hooked to obsessed!!

I had been following a couple of forums and was amazed at the freely shared information from really fantastic artists. I had been following the saga of a trade between Susan Crocenzi and Kim Grant. Susan had posted little snippets of a piece she was making for Kim in exchange for her website Kim had developed. The piece was like nothing I'd ever seen before and I knew I HAD to learn to do it. That was my introduction to tempered glass and polymer clay tiles! I found out that Susan lived in California, like me, and that she held classes so sign me up!! I was blessed to be able to go to her cabin in the beautiful woods and learned her method of tempered glass and polymer clay. (and get to hang with Kim, who as luck would have it, was visiting Susan too)

Since then, I have loved experimenting with tempered glass and pc. I love the flexibility mixing these mediums provides. I've also moved forward and have been working with creating Styrofoam and concrete substrates. Such fun to be had!!

I was so thrilled to be able to attend SAMA this year and the exposure to so many wonderfully creative and sharing artists! I'm filled with ideas and projects and can't wait to get busy.

Some of Donna's work

Monday, March 30, 2009

Mosaic Portraiture

The making of Christopher

Gather your supplies:
1. Photograph that you want to use for your subject
(at least 8x10)

2. 11x14 art board (use an art board as opposed to
stretched canvas, as stretched canvas will move
and possibly detach tesserae from surface).

3. Tracing paper

4. Transfer paper

5. Weldbond glue

6. Stained glass, nippers, tweezers, glass cutter,
whatever tools you prefer to nip and cut...

Step 1 - Choose your photograph


Step 2- Trace outline of photograph onto tracing paper. (this tracing is from another mosaic...I couldn't find the one from “Christopher”)‏


Step 3- Transfer outline onto art board using transfer paper. Tape transfer paper and tracing paper to art board to prevent shifting. Be sure to shade any and all shadows and variations in tones, or value changes. These subtleties are what gives your portrait life!


Begin with the eyes, then the nose, then work outward.


Don't be afraid to use color! A color wheel is a very useful tool to find out how colors relate to each other, which ones might work together and which ones probably won't.


I like to use Van Gogh glass for the background. It is available in a variety of color variations that will complement your portrait.

This picture was taken just after grouting.


About The Author


Ramona Hovey started working with stained glass about 10 years ago, working in both copper foil and lead came techniques.

About 3 years ago I discovered mosaics and it seemed to fit right in with what I wanted to convey to women who are trapped in the horrible cycle of domestic violence and abuse. As I work with broken pieces of pottery, shards of stained glass, or discarded trinkets, I envision the broken lives of people struggling with violence and abuse at the hand of one who claims to love them. As I see these broken, discarded pieces come together to form something beautiful or pleasing to the senses I am reminded of the hope and the promise that is available for those women, children and families, if we will but work to reach them.

My hope, is that through my outreach ministry with the S.O.S. Mission at St. Paul's Church in Asheville, NC, I will reach these families and help equip them with the tools necessary to put the pieces of their lives back together to make something beautiful.

Here is some of her work.

Sunday, March 15, 2009

Double Direct Method on Mesh

The double direct method on mesh is one method of laying your tessarae onto your substrate. What is great about this is if your substrate is vertical or 3D this really helps. It is easier to keep your pattern & very flexible in that you can install it anywhere, whether it is on a tabletop, kitchen backsplash, or an outside mural. The versatility is tremendous.

You will need fiberglass mesh before you begin. It is very important to use fiberglass mesh since it takes much longer for it to deteriorate than other mesh. This is sold in square yard sections or you can get it in a continuous roll - I call it drywall tape.

I am using the drywall tape in the roll as this is what I have on hand. Now mine is a little dirty because I used this roll when making cement leaves for a reinforcement between layers of cement and cement is rather messy. But I think it helps in the pictures to see how it works. It is a little sticky so it helps holding the tape to each other.


  • Layer 1 - Pattern

  • Layer 2 - Wax paper or Saran Wrap

  • Layer 3 - Mesh

  • Layer 4 - Tessarae


Here is a pic of the different layers. You can use Weldbond to glue your tessarae onto the mesh as well as other glues. I am using Dap Kwik Seal Kitchen & Bath Adhesive Caulk in the clear


Here I am gluing the tessarae down over the pattern and the mesh. My pattern isn't exact - just a rough sketch but since it was retangular in shape I didn't really need it to be exact. The tessarae is some broken dishes.


The finished birdhouse. I'm already thinking of making the roof white. I can take the tessarae off easily when I change my mind.

You can either glue or use thin set mortar to place the mesh and tessarae onto your substrate and then grout.

What's great about using the mesh, I plan on making different flowers on mesh too. I will then glue all the different flowers & the birdhouse on a big piece of mesh together to make the design complete and then glueing onto the substrate. I'm doing this so I can do placement of everything on the final piece.

Thursday, February 12, 2009

Friday, January 30, 2009

Tempered Glass (Crash glass)

Tempered glass is one of two kinds of safety glass regularly used in applications in which standard glass could pose a potential danger. Tempered glass is four to five times stronger than standard glass and does not break into sharp shards when it fails. Tempered glass is manufactured through a process of extreme heating and rapid cooling, making it harder than normal glass.


The brittle nature of tempered glass causes it to shatter into small oval-shaped pebbles when broken. This eliminates the danger of sharp edges. Due to this property, along with its strength, tempered glass is often referred to as safety glass. Notice the thinner TG, 1/8" is more delicate when shattered. Most stained glass is 1/8" and using 1/8" or 3/16" is easier to mosaic with the same heighth.

Automobiles use a different type of safety glass for the windshield and tempered glass for the back and side windows. Windshields are made from laminated glass, which sandwiches a sheet of plastic between two panels of glass. When the windshield breaks, the glass panels stick to the plastic film, rather than falling away to possibly injure the driver or other passengers.

Tempered glass breaks in a unique way. If any part of the glass fails, the entire panel shatters at once. This distinguishes it from normal glass, which might experience a small crack or localized breakage from an isolated impact.


This makes it perfect for mosaics! Tempered glass comes in colors - clear, green, bronze, and gray. It also comes in different thicknesses. 1/8", 3/16", & 1/4". Car windows is 1/4" thickness where as shower doors are usually 3/16". You can also buy textured tempered glass. This picture is comparing the thickness of 1/8" & 1/4" TG.

There are some online mosaic suppliers that sell tempered glass (tg) but I would look in a phone book for glass companies that manufacture tempered glass. They may have scrap glass you can buy. I did that from a local company and he gave me a discount since it was from a special window a customer didn't buy. You can also try Craig's List.

You can paint under TG, add ribbons, pictures, glitter. The sky is the limit. If you do paint your substrate, I would use a sealer before applying the TG and the glue. Mine turned a green color underneath the glass without the sealer.


Here is a box where I used TG. I painted part of the box with gold acrylic paint & then a clear spray before I glued the TG down.

Saturday, January 17, 2009

Grinding Edges On Glass


Grinding edges of tiny pieces of glass can be a little tricky. It's easy to grind away your nails, cutting your hands from holding the glass pressing into the grinder, etc.


I invested in the Glastar Griffi & highly recommend it. It makes grinding glass so much safer & easier.


What's great about it is you grind while it is sitting on your grinder - perfect angle - and it's under the glass eye shield so your eyes are still protected using the Griffi.


I took a pic with a dime to show you the leaves I am grinding for comparison purposes. The Griffi is also holding one of the leaves with no problem. It is perfect for grinding your glass, no matter what the size! The glass pieces do not go flying anywhere. The Griffi holds onto the glass no matter what the size.

Here is a photo using the leaves.